Sample tools
When one or more samples are selected in the tree, the tool menu contains several tools sorted in 4 categories:
Using the tools simultaneously on several samples is possible (with a multi selection).
Audio processing
Change volume
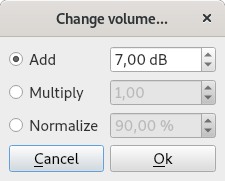
You can change the sample volume in three different ways:
- in adding a certain amount of dB (positive or negative amount),
- in multiplying the signal by a number,
- in normalizing the signal so that the maximum of this signal represents some percentage of the maximum intensity.
External command
This tool allows you to use an external command or program to edit a sample. You don't need to export and re-import a sample into Polyphone anymore, everything is done automatically:
- download an editing software for .wav files such as Audacity or Sweep (Linux),
- use the tool External command for one or more samples,
- fill the command line in the right field to call the external software (you may need to read the documentation of this software),
- edit the sample(s) with the external tool,
- save the modified version of the wav file(s) with the external tool and close it,
- the sample(s) will be automatically loaded into the soundfont.
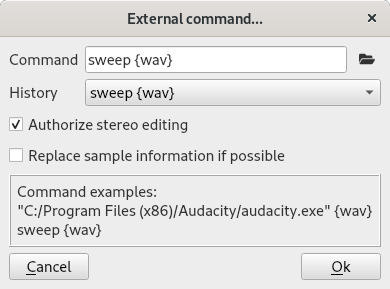
Note: during the process, Polyphone exports a .wav file and will reimport this same file after the external command has been run. If the external command creates other files or saves the result as another file, those files will be ignored and Polyphone will reimport the file initially exported that will probably be not modified.
Filter frequencies
When you use this tool, a window will be displayed showing the frequencies contained in the sample(s) you selected. You can then use the mouse to draw a red area. Everything that is in this area will be removed: this means that you can manually decrease of remove some frequencies.
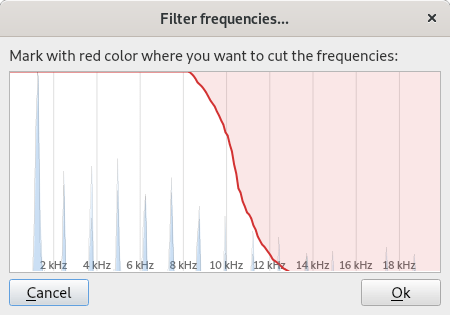
Note: This filter is not common since it cuts frequencies in a hard way. This tool can be useful to design a brick-wall filter but in most cases you will probably want to use the equalizer.
Transpose
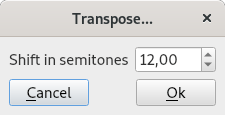
The tool asks for a shift in semitones and then re-samples the sound to change the pitch.
Fast editing
Load a parameter from the instruments
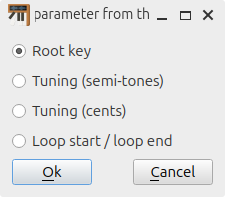
Parameters at the instrument level can override or offset the parameters defined at the sample level. With this tool, it is possible to fix or complete the sample parameters with what is defined in the instruments using these samples:
- modifying the sample root key with the override defined at the instrument level,
- shifting the sample root key with the “Tuning (semitones)” parameter,
- shifting the sample pitch correcting with the “Tuning (cents)” parameter,
- defining the sample loop start and end with the loop offset parameters.
Shift a parameter
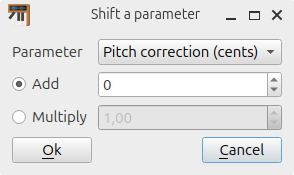
This tool allows the simultaneous editing, by adding or multiplying a value, of one of these parameters for all selected samples:
- root key,
- correction,
- loop start,
- loop end.
Files
Wav export
After having selected a destination directory, all selected samples will be exported as .wav files.
Loop / playback
Auto loop
The software seeks two positions in the sample, distant and suitable for creating a loop. If needed, a short sound segment is copied with a cross-fade so that the transition at the join location is as smooth as possible.
If it fails, a warning message appears indicating that no loops can be found.
Warning: This tool modifies the original sample. Modifications can be undone via the “undo” function, but if the file is saved and Polyphone is closed there is no way to step back.
Note: By default, the looping is disabled in an instrument.
To hear it, you must select  in the Loop playback parameter row of either the Global or individual notes columns in the table.
 turns it On,
  turns it Off.
 turns the looping On and the sample will play to the end after a key is released.
Cross-fade loop
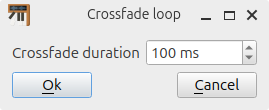
The cross-fade tool can be seen as the manual version of the auto loop tool. First, you need to position the start and end of the loop in the graphic (WAV display area) around a stable area. Then, this tool creates a loop from theses positions by applying a cross-fade whose duration is configurable. Everything is therefore configurable but care must be taken when searching for the start and end of the loop:
- at both positions, the harmonics of the sound must match so as not to hear a scratched vinyl record effect during the transition,
- the phases of the different harmonics must also match so as not to hear a frequency cancellation during the cross-fade, which strongly alters the timbre of an instrument,
- as much as possible, the end of the loop must be far from the start to avoid a sound that is too synthetic.
A tip is to focus on positions where the wave crosses the x-axis (value 0).
Remove blank at start
Any blank area before the sample begins is eliminated, reducing the time before the sound is heard.

Note: this tool may be applied automatically each time a sample is imported, the option being in the software settings.
Trim to end of loop
If a loop is defined for the selected sample, the software will cut the sound after the end of the loop (leaving a small margin at the end).

Note: this tool may be applied automatically each time a sample is imported, according to the software settings.
Stereo samples
Balance adjustment
If the sample is linked to another one (stereo), the software can equalize the mean intensity of the two samples to adjust the balance. This will then be easier to accurately pan a sample in an instrument.
Find a link
Among the selected samples, samples whose names only differ by the last letter (L / R) are automatically linked.
For example, if in a soundfont two samples are called bassoon45L and bassoon45R, bassoon45L will be recognized as the left part of bassoon45R and bassoon45R will be recognized as the right part of bassoon45L.
With this information the right panning will be used when these samples are added in an instrument. You can also enjoy the simultaneous editing of left and right parts in the instrument table if the stereo editing is activated in the settings.
Warning: This tool can break existing links if the names don't match the rule above.
Unlink
All selected samples that are linked (stereo) are unlinked.
Thus, all samples will be processed as mono sounds and they will all have the same panning if they are added in an instrument. The stereo editing, if activated in the settings, will not be applicable anymore.
Polyphone is free but there are costs associated with its website and development. A small donation will help a lot.
Donatetop