Create a synthesizer with a Raspberry Pi
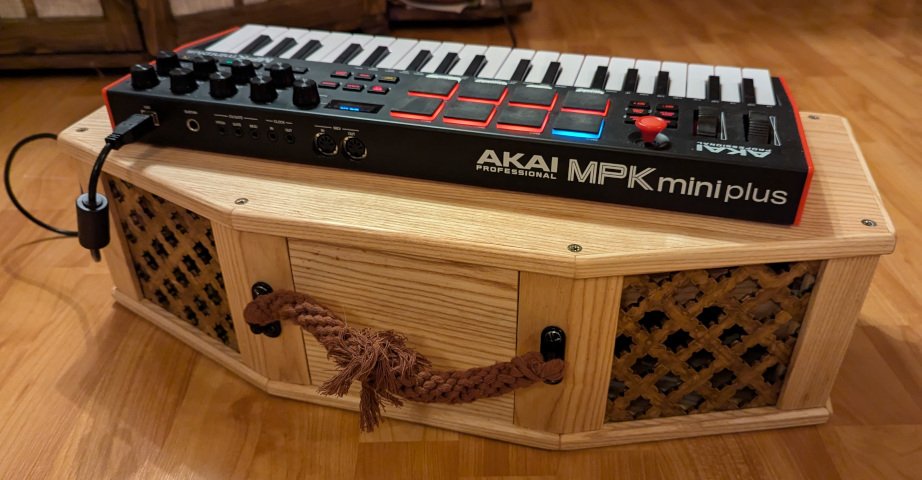
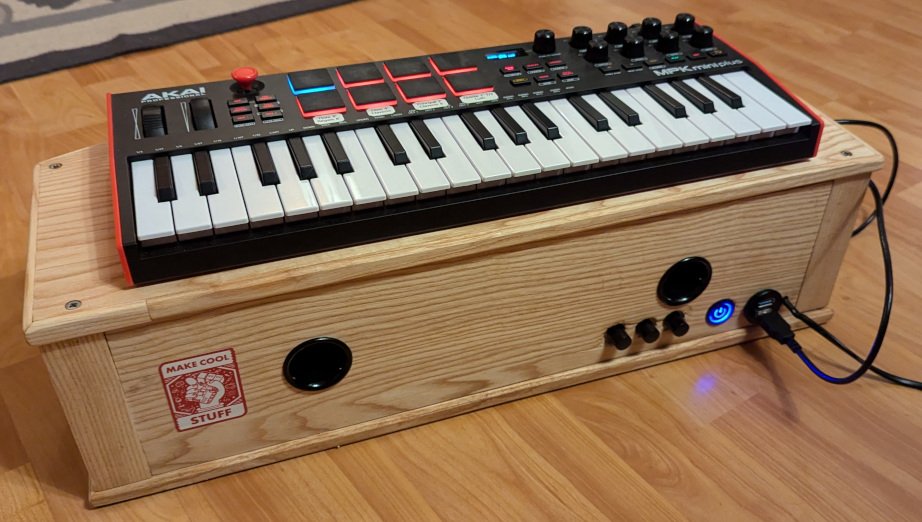
A Raspberry Pi is a credit-card-sized computer in which Polyphone can be installed. By integrating it into a box containing speakers and associating it with a master keyboard, it's possible to create a real synthesizer!


Materials required
This list can be adapted to suit your project:
- a Raspberry Pi,
- a micro SD card with a capacity of 32 GB or more,
- a power supply for the Raspberry Pi,
- an analog/digital converter (DAC) to transform a USB output into an audio jack,
- computer speakers, which have the advantage of containing both the speakers and the signal amplification part,
- a general on/off switch,
- a 2x male to female USB flush mount cable,
- a case to put everything inside,
- and of course a master keyboard for playing.
To easily configure the Raspberry Pi, it is recommended to also have:
- a screen with a mini-HDMI cable for the connection to the Raspberry Pi,
- a keyboard,
- a mouse.
In the example on this page, second-hand Edifier R1280T speakers have been used. For a modest price, they are capable of reproducing low tones relatively well, and as you will see below, it will be possible to correct frequency response shortcomings.
The master keyboard used is an Akai MPK Mini Plus, connectable via USB. The USB / jack adapter is a first-price UGREEN and the Raspberry Pi is version 5.
(the aim of these details is not to advertise any particular brand, but to present a combination that works)
Preparing the box
This tutorial will not focus on one particular way of making a box. The use of wood will showcase your carpentry skills, as in this example, but cardboard can work just as well. It's up to you to express your creative talents! Overall, you will need a cover to access the components, and openings for:
- the speakers,
- the power cable,
- the on/off switch,
- the volume and - if necessary - equalization knobs,
- the Helmholtz resonators for the bass-reflex, and so on.
A suggested order of installation in the box is as follows:
- start by recessing the on/off button, the USB connectors on the rear panel and any other buttons connected to the speakers,
- place the power cable and connect it to the input of the on/off button,
- place the transformer associated with the speakers and connect it to the output of the on/off button,
- place the speaker circuit board and connect it to the transformer,
- attach the speakers and connect them to the circuit board,
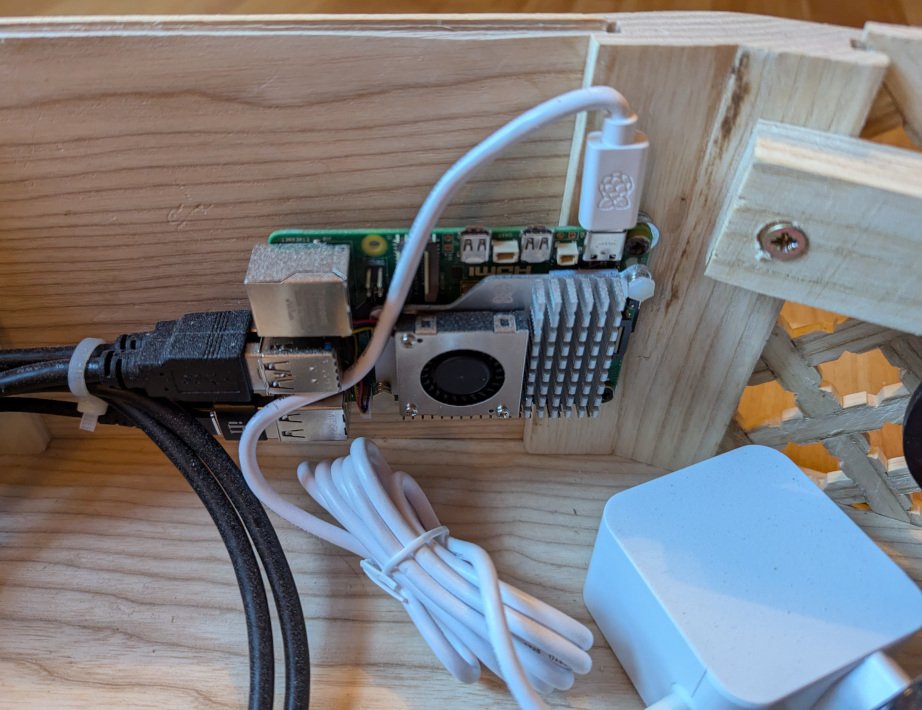
- attach the Raspberry Pi,
- connect the Raspberry Pi power supply to the output of the on/off button (the output of the button supplies power to both the speakers and the Raspberry Pi),
- connect the double USB cable to the Raspberry Pi,
- connect the USB/jack converter to another USB socket,
- connect the speaker circuit board via a jack cable.
In the following image, the power supply and the electronic board related to the speakers are circled in orange. The Raspberry Pi is circled in blue.

Note: speakers must be placed so that there is no possible return of sound between the speaker output and the inside of the box, otherwise a resonance will appear. So not like in this example! Sometimes we need to experiment to discover traps...

3 USB ports are used:
- one to obtain a jack output,
- the other 2 are redirected to the back of the box and will be used to connect the master keyboard or, when configuring the Raspberry Pi, a keyboard and a mouse.
Preparing the Raspberry Pi
Installing Debian
One of the first steps to be taken when receiving a Raspberry Pi is to install Debian on a micro SD card. You can easily find instructions on the Internet, for example here .
Once the micro SD card has been prepared, you can insert it into the slot provided in the Raspberry Pi. Then connect the power supply, monitor, mouse and keyboard, and your computer is ready to go!
Installing and configuring Polyphone
First, update the system with:
apt-get update
apt-get upgrade
Then install Polyphone using the .deb package available on this page. Connect the MIDI keyboard via USB to the Raspberry Pi (disconnect the computer keyboard if no USB port is available), then open Polyphone and select the MIDI keyboard from the drop-down list of MIDI inputs in the settings. By downloading a soundfont, for example from the library, it's already possible to play an instrument with the MIDI keyboard associated with the Raspberry Pi!
Launching Polyphone automatically
This step is necessary to eliminate the need for the screen. Polyphone can be launched automatically when the Raspberry Pi starts up by creating a synthesizer.desktop file, containing this text:
[Desktop Entry]
Name=Synthesizer
Exec=polyphone -s /home/pi/Desktop/my-soundfont.sf2
Terminal=false
Type=Application
StartupNotify=true
Icon=/home/pi/Desktop/my-icon.png
Categories=AudioVideo;
This file will then be placed in the /home/pi/.config/autostart folder.
The command line can be expanded with options for listening to a particular MIDI channel, playing several instruments simultaneously or activating/deactivating instruments via keys. This page details the options for using Polyphone in synth mode.
To go further
Sound equalization
Each loudspeaker, by virtue of its morphology, responds more or less differently depending on the frequencies you want it to emit. To obtain a flat frequency response and thus faithfully reproduce the sound, it is possible to create an equalization that compensates for the loudspeaker's shortcomings. The HiFiScan tool automatically calculates the equalization parameters, the protocol being described on the project page.
Once the equalization curve has been calculated, HiFiScan can export coefficients for integration into equalizers. We are interested in the 12-band equalization that can be used with Calf.
Remote connection
Up to now, Raspberry Pi configuration has required a screen to display the desktop. However, it is possible to configure the system to allow remote access via the VNC protocol, and resources are available on the Internet for its configuration.
Polyphone is free but there are costs associated with its website and development. A small donation will help a lot.
Donatetop